LOADING LABEL & ADJUSTING PRINT SETTING FOR SATO PB2-230
Article by Blue. Updated January 19, 2021
Having trouble with your SATO PB2-230 Handheld Price Labeler? Here is a step-by-step video to guide you in properly placing (or replacing) labels and ink into your labeler unit. Below is the video timestamp for quick reference:
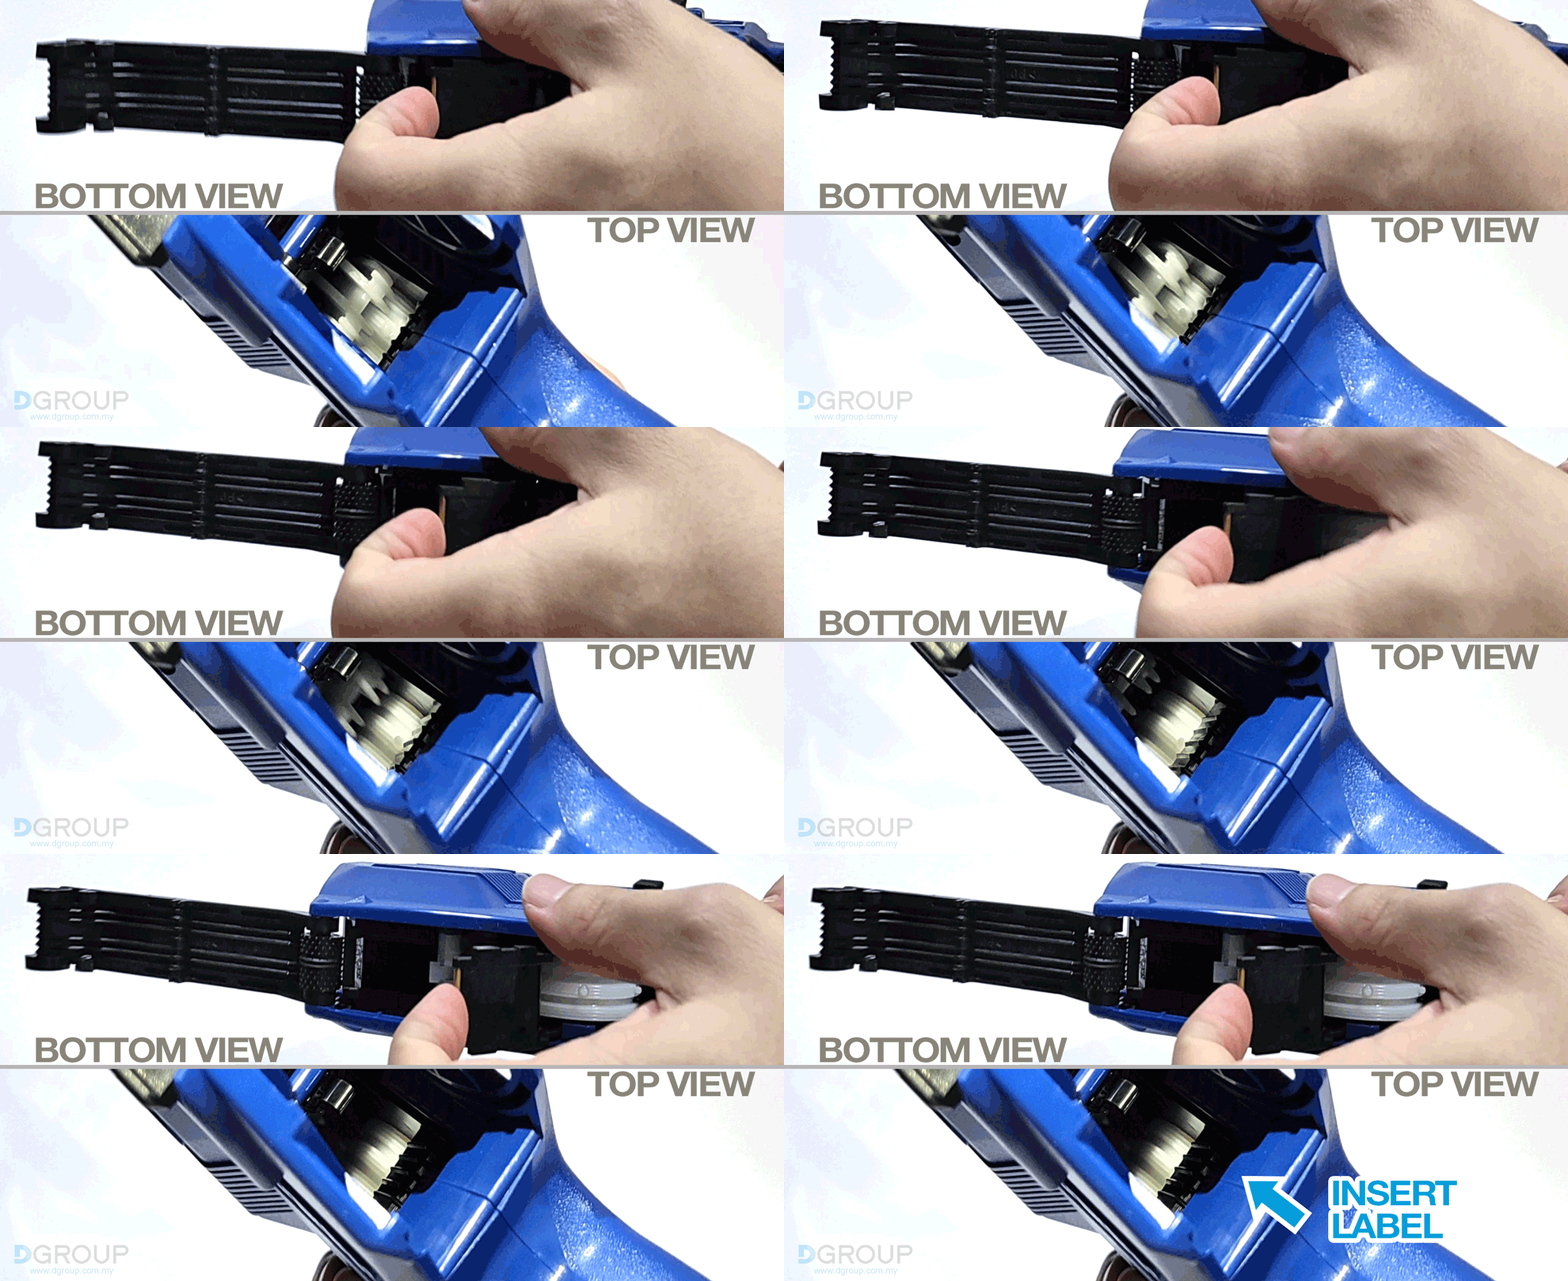
- Loading label into Labeller - The loading process might be daunting at first. With the correct steps and notes taken, the sticker roll can be easily maneuvered into the labeler. When releasing the bottom hatch/cover, you will notice the gears moved to form an opening from the top. The label can be slide through this shaft, emerging from the bottom of the labeller. To aid this process, the tip of the label is folded to ensure easy entry into the labeller. Below is the diagram showing the opening of bottom hatch and the opening of shaft for label entry:
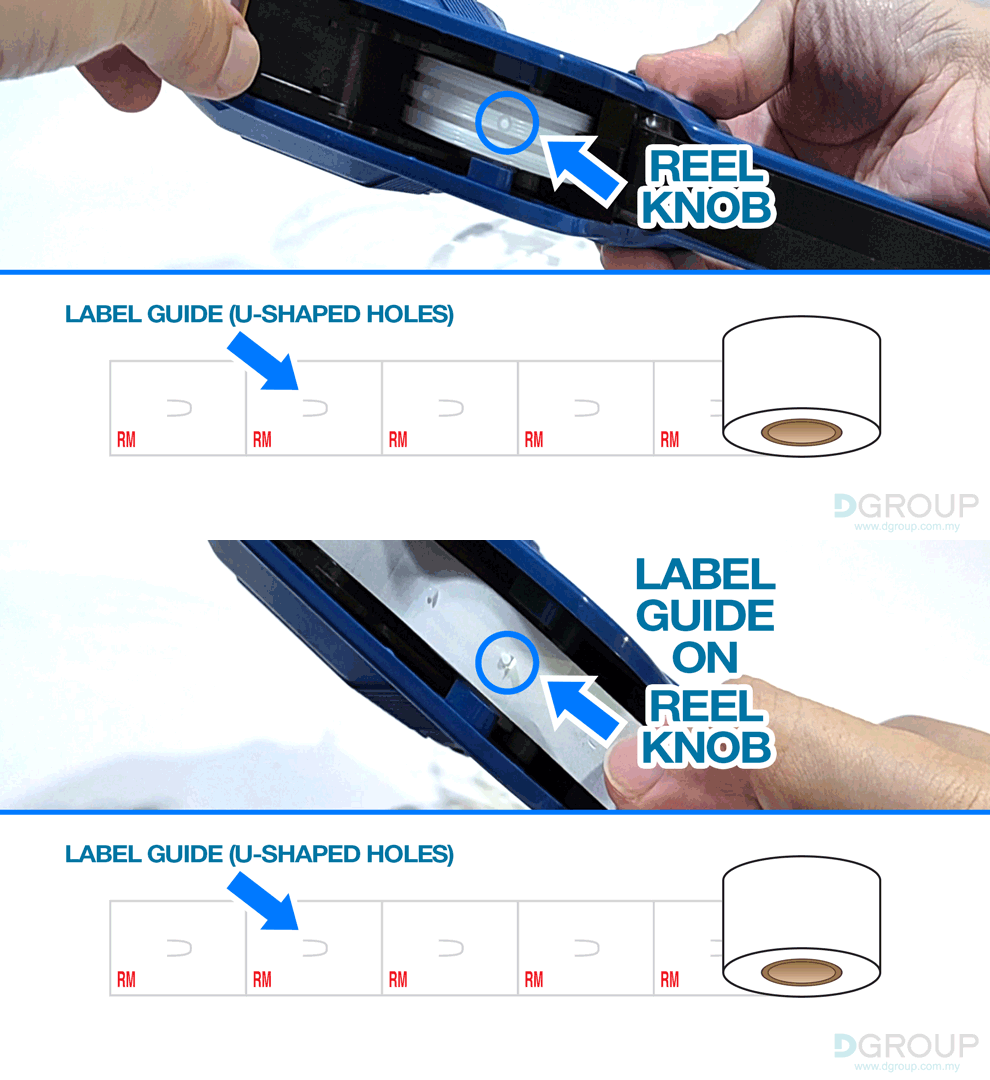
- Reel knobs - The revolving reel is what pulls and moves the labels. There are existing holes (guides) on the labels which serves this purpose. They are the angled U-shaped cuts on the label. You need to position the label guide onto the reel knob properly. Before you do that, the stickers are peeled off from its backing paper. This step removes the problem of sticker jamming up the reel. After ensuring the label guide is in position, close the bottom hatch/cover. Diagram shown as below:
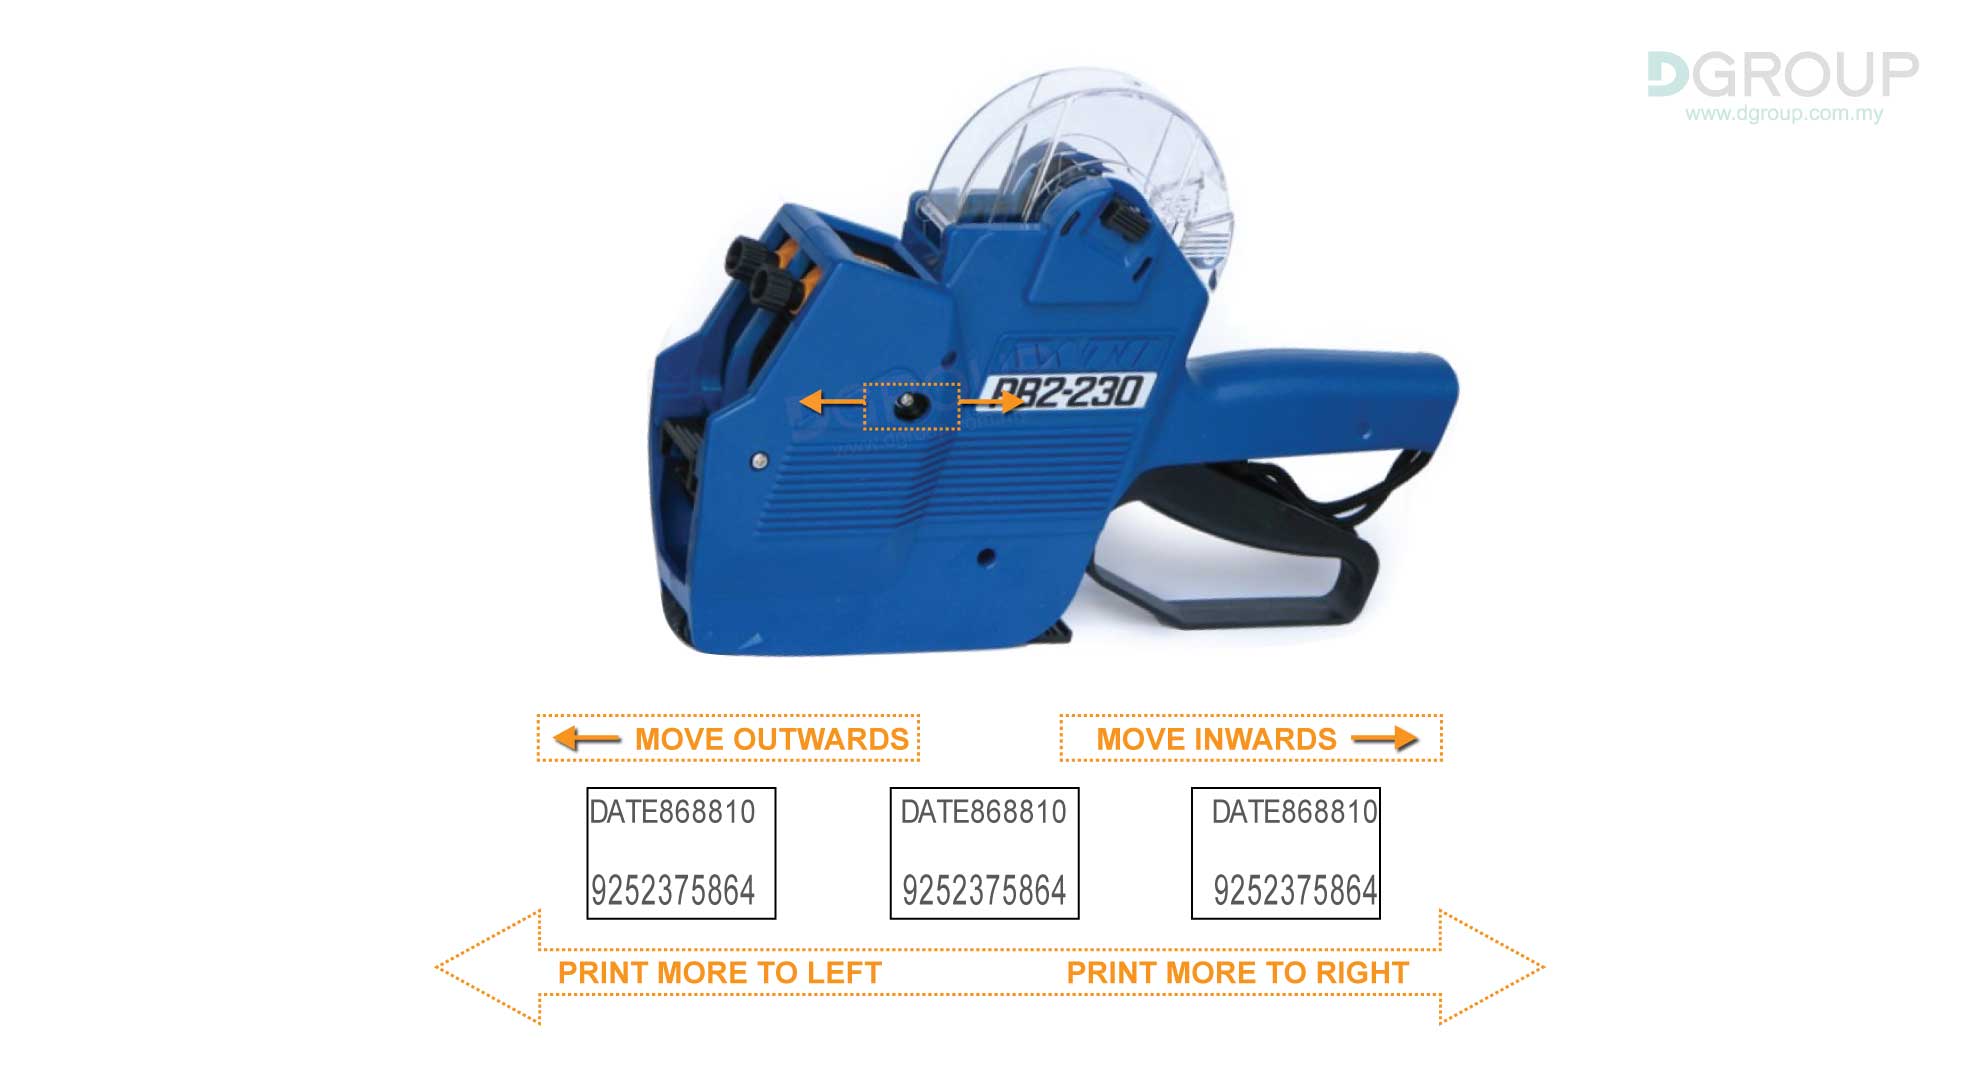
- Label Print Position - Most application will not involve all characters in the print band. Hence, the end result of the printing may look misalligned. As such, there is a need to reallign the printing position. This can be done by moving the print mechanism away or towards the machine. When moved away from the labeler, the characters will print more towards the left of the label. Else when moved inwards, the printing will allign towards the label's right side. Below is the guide to adjust the print position:


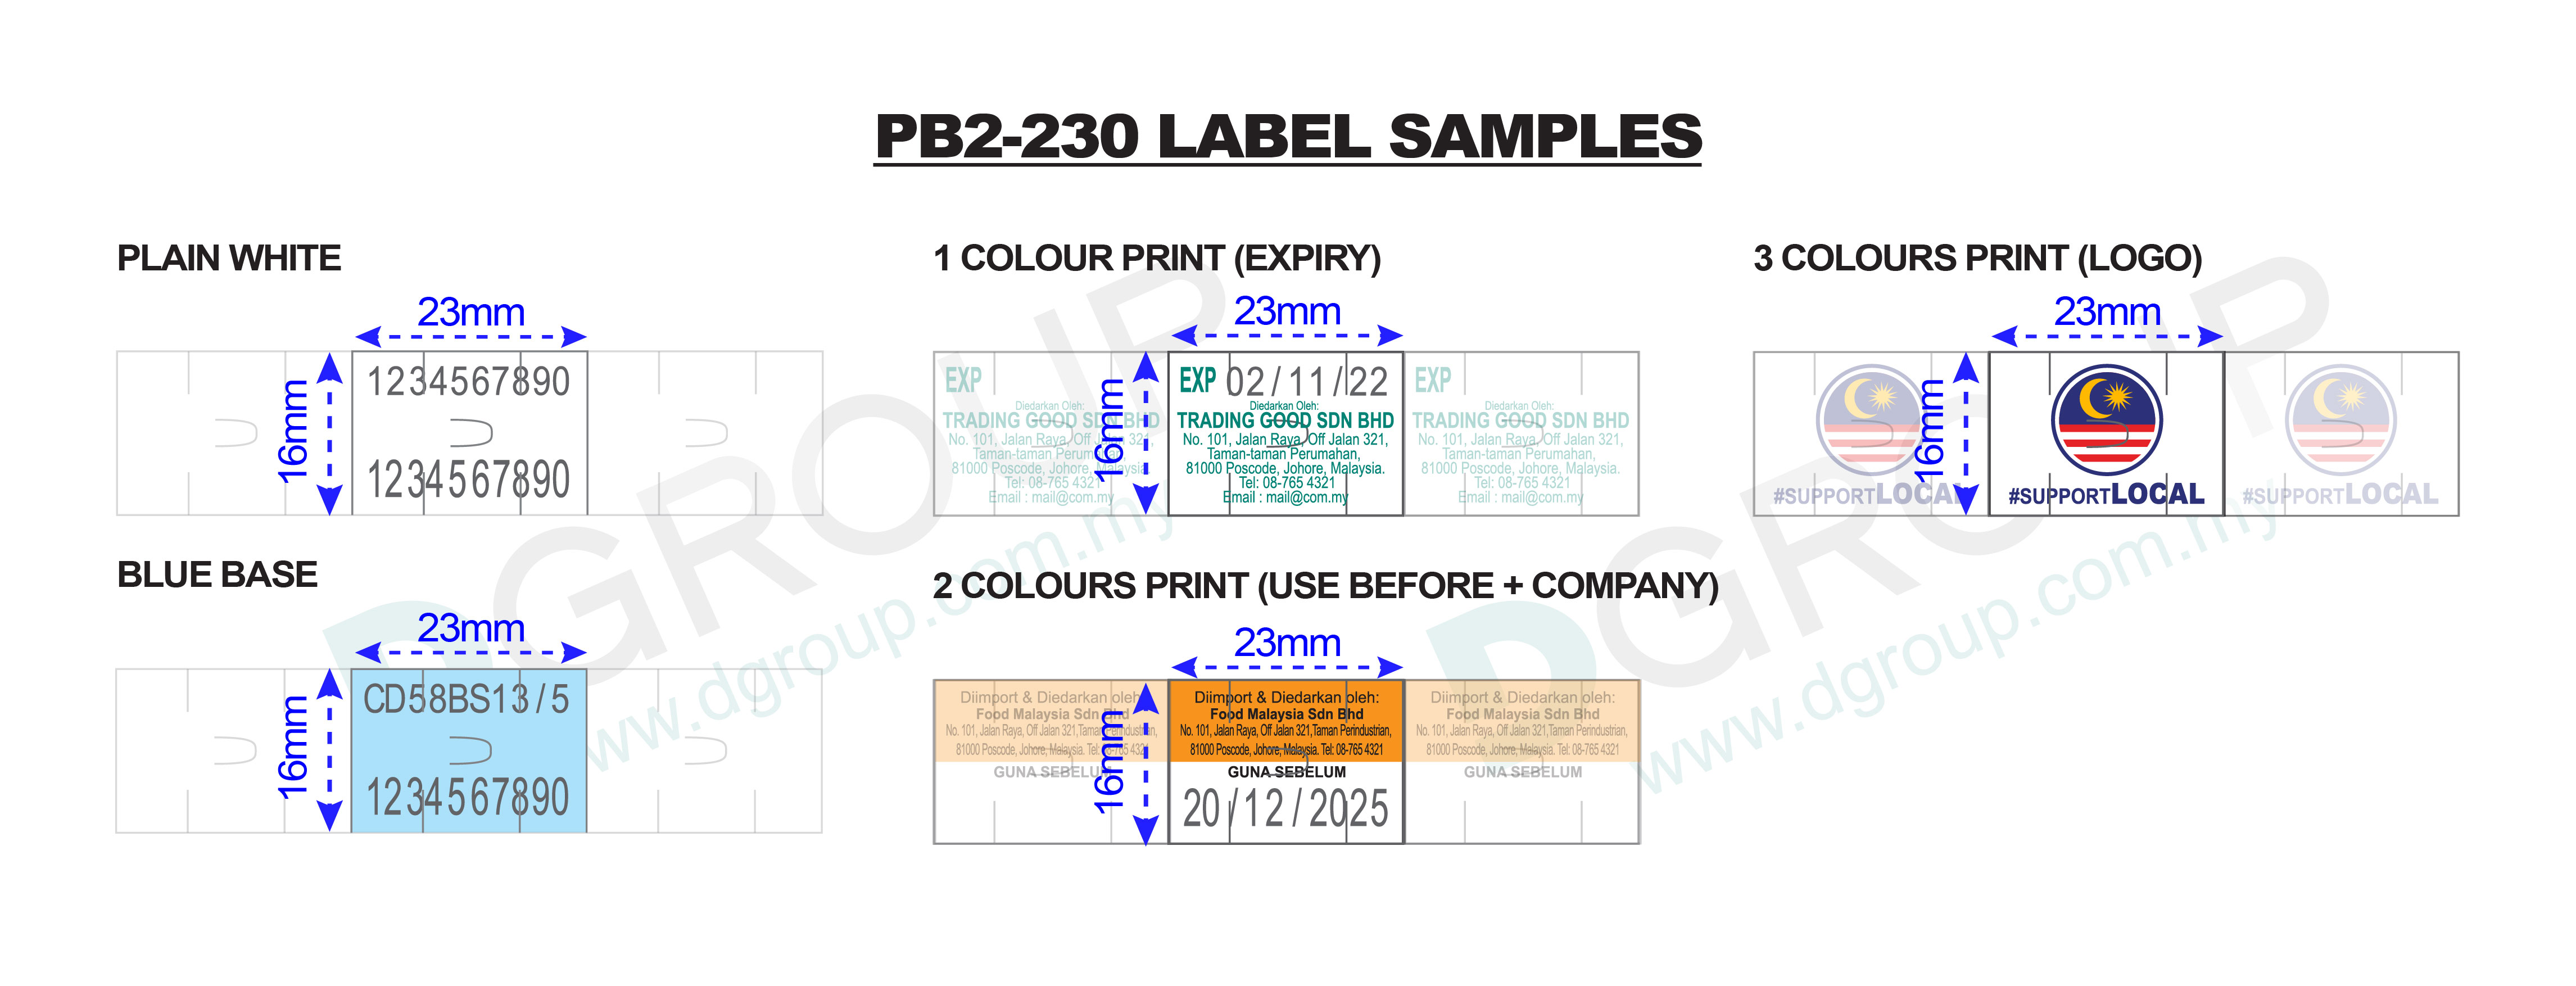
SATO PB2-230 allows you to print up to 20 characters; including 10 alpha-numerical characters. This versatility broadens its usage in price-marking applications, product identifications and for control purpose.
- Prints two lines; up to 10 characters per line.
- Printband stopper feature protects against over-rotation of bands.
- Transparent cover protects the label and keeps label clean.
- Flexible usage - Works with both face-in and face-out labels.
- Applications: Price indication, date indication, lot no. indication, product code etc.

For more information on the labeler or sticker rolls, contact us now!